


Disc Filter Installation
In industrial filtration, the performance of a system is as much a product of precise installation as it is of high-quality component manufacturing. For engineers and maintenance professionals, understanding the nuances of disc filter installation is critical to ensuring process integrity, preventing bypass, and extending the service life of the filtration media. Whether utilized in chemical processing, hydraulic systems, or food and beverage production, stainless steel Filter Discs & Packs serve as the primary barrier against contaminants. However, if these components are improperly seated or handled, the entire filtration circuit can be compromised.
This guide provides a technical overview of the engineering considerations, step-by-step procedures, and common pitfalls associated with the installation of precision metal filter discs and multilayer packs.
Engineering Fundamentals of Filter Discs & Packs
Before beginning the disc filter installation process, it is essential to understand the structural characteristics of the media. Stainless steel filter discs are typically constructed from woven wire mesh, sintered metal fibers, or a combination of both. In many demanding industrial applications, multiple layers of mesh are combined into "packs" to provide graduated filtration and structural support.
Material and Construction Variations
Filter discs are often manufactured from 304, 316, or 316L stainless steel to provide corrosion resistance and thermal stability. The construction may involve:
* Single-layer Discs: Used for basic straining or as support layers.
* Multilayer Packs: Often spot-welded or bound with an aluminum or stainless steel rim (edge binding) to maintain structural integrity under high pressure.
* Sintered Discs: Layers of mesh are fused together through a heat-treatment process, creating a rigid, non-deformable structure that is easier to handle during installation but requires precise housing tolerances.
Understanding whether a disc is flexible or rigid determines the amount of torque required for sealing and the type of gaskets or O-rings necessary for a leak-proof fit.
Pre-Installation Inspection and Material Verification
Effective disc filter installation starts before the component is placed into the housing. A rigorous inspection protocol ensures that the filters meet the required specifications and have not been damaged during transit or storage.
1. Dimensional Accuracy
Verify that the outer diameter (OD) of the filter disc matches the internal dimensions of the filter housing or holder. Even a sub-millimeter discrepancy can lead to bypass—where fluid flows around the filter rather than through it. For multilayer packs with edge binding, ensure the thickness of the rim is consistent, as uneven thickness can lead to improper sealing pressure.
2. Surface Integrity
Inspect the mesh surface for any signs of "blinding" (pre-existing clogs), tears, or creases. In sintered or welded packs, check the perimeter for loose wires or burrs. These defects can damage the sealing surfaces of the housing or introduce metallic contaminants into the downstream flow.
3. Cleaning and Degreasing
While many industrial filters are delivered clean, certain applications (such as pharmaceutical or oxygen service) require specialized degreasing. Ensure that the filter discs are free of oils, dust, or packaging residues. If cleaning is required, use compatible solvents that will not cause intergranular corrosion in the stainless steel.
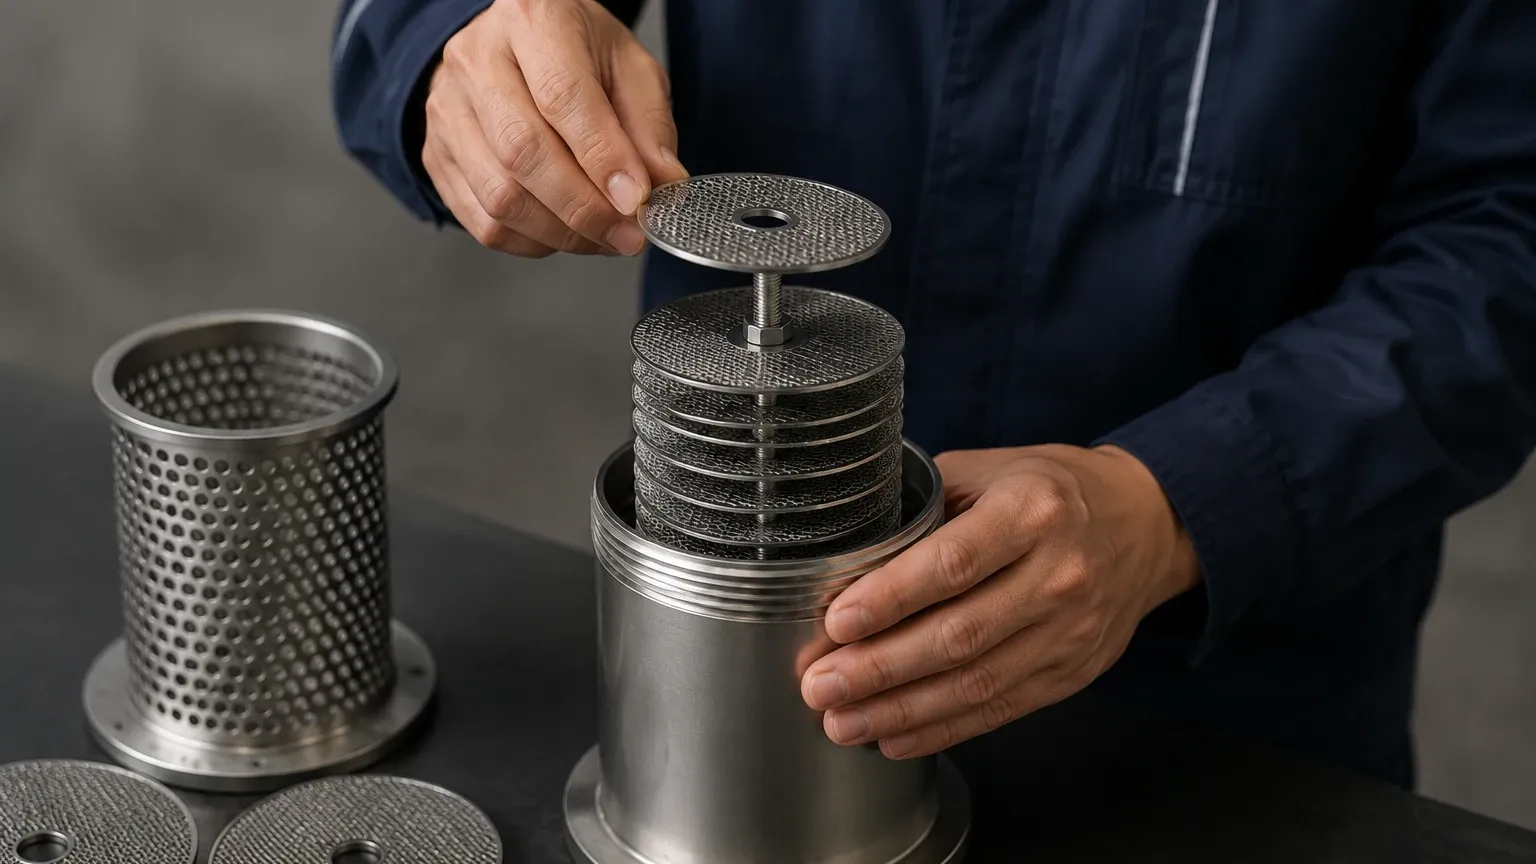
Systematic Disc Filter Installation Procedures
The actual process of disc filter installation varies depending on the housing design—whether it is a simple mesh strainer, a polymer melt filter, or a high-pressure hydraulic assembly. However, the following general steps apply to most industrial configurations.
Step 1: Housing Preparation
Clean the internal sealing surfaces of the filter housing. Remove any remnants of old gaskets, scale, or debris. A scarred or dirty sealing surface is the most common cause of filtration failure. Inspect the "seat" where the disc will rest to ensure it is perfectly flat and free of pitting.
Step 2: Orientation and Layering
For asymmetrical filter packs, orientation is critical. Many packs are designed with a specific "upstream" and "downstream" side. The upstream side often features a coarser mesh to act as a pre-filter, while the downstream side contains the fine micron-rated mesh and a heavy support layer. Installing a pack upside down can lead to rapid clogging or the collapse of the fine mesh under pressure.
Step 3: Centering the Disc
Place the disc or pack into the housing, ensuring it is perfectly centered. If the disc shifts during the assembly of the housing cover, the edge may be crushed, or a gap may open on the opposite side. In horizontal installations, utilize centering pins or guides if provided by the equipment manufacturer.
Step 4: Gasket and Seal Placement
If the design requires external seals, ensure the gaskets are compatible with the process fluid and temperature. Place the gaskets carefully to avoid overlapping the active filtration area of the mesh. For metal-to-metal seals, ensure that the disc's edge binding is seated flush against the housing shoulder.
Step 5: Controlled Compression
When securing the housing cover or the retaining ring, apply pressure evenly. For multi-bolt flanges, use a star-pattern tightening sequence. This prevents the disc from tilting and ensures that the sealing pressure is uniform across the entire circumference of the filter.
Managing Sealing Integrity and Preventing Bypass
The primary technical challenge during disc filter installation is the prevention of bypass. In high-precision applications, such as those requiring 5-micron or 10-micron filtration, even a microscopic gap between the filter and the housing can allow a significant volume of unfiltered material to pass through.
The Role of Edge Binding
Edge binding (or framing) provides a solid surface for the housing to grip. In high-pressure environments, the compression of the frame creates the seal. Engineers must confirm that the compression force is sufficient to deform the gasket or seal the metal surfaces without crushing the internal structure of the wire mesh. Over-tightening can lead to "media migration," where the wires of the mesh are stressed to the point of breaking.
Thermal Expansion Considerations
In high-temperature applications, such as polymer filtration or hot gas recovery, the differential thermal expansion between the stainless steel filter and the housing material (often carbon steel or specialized alloys) must be considered. If the installation is too tight at room temperature, the filter may buckle as the system heats up. Conversely, a loose fit may result in bypass once the operating temperature is reached.
Post-Installation Testing and Performance Monitoring
Once the disc filter installation is complete, the system should be validated before full-scale production begins. This phase confirms that the installation was successful and that the filters are performing according to their micron ratings.
1. Pressure Decay and Bubble Point Tests
In critical applications, a bubble point test can be performed to check the integrity of the installed filter. By submerging the assembly or using specific test fluids, engineers can identify if there are any oversized pores or installation leaks. A pressure decay test can also confirm the integrity of the seals.
2. Differential Pressure ($\\Delta P$) Monitoring
Immediately upon startup, record the "clean" differential pressure. This is the pressure drop across the filter at the standard flow rate. If the initial $\\Delta P$ is lower than expected, it may indicate a bypass or a hole in the filter media. If it is significantly higher, the filter may be improperly seated, restricting the flow path, or the media may have been pre-contaminated.
3. Downstream Sampling
Taking fluid samples immediately downstream of the filter housing during the first hour of operation is a practical way to verify performance. The presence of particles larger than the filter's micron rating is a clear indicator of an installation error or a defective filter disc.
Maintenance, Cleaning, and Replacement Protocols
Stainless steel Filter Discs & Packs are often selected for their ability to be cleaned and reused. However, the removal and re-installation process requires as much care as the initial setup.
Determining Replacement Cycles
The replacement cycle is typically dictated by the terminal differential pressure—the point at which the pressure drop is so high that it risks damaging the filter or the pump. Engineers should establish a clear threshold for replacement based on the structural limits of the filter disc. For example, a sintered disc may withstand a higher $\\Delta P$ than a single-layer woven mesh disc.
Cleaning Procedures
When removing discs for cleaning (via ultrasonic baths, chemical cleaning, or backwashing), it is vital to track the number of cleaning cycles. Repeated cleaning can eventually fatigue the metal wires or enlarge the pore sizes. During re-installation, always use new gaskets or O-rings, as these components often take a "set" and will not seal effectively a second time.
Storage of Used Discs
If filters are cleaned and stored for future use, they must be dried completely to prevent microbiological growth or localized corrosion (pitting). Store them in a flat, tension-free environment to prevent warping, which would complicate the next disc filter installation.
Conclusion
Precision disc filter installation is a fundamental requirement for achieving the efficiency and reliability promised by high-performance stainless steel filtration media. By focusing on housing cleanliness, proper orientation, and uniform sealing pressure, technical teams can significantly reduce the risk of bypass and mechanical failure.
As a manufacturer of custom filtration solutions, Kaifil emphasizes the importance of matching the filter design to the specific mechanical requirements of the housing. Whether you are dealing with standard wire mesh discs or complex multilayer packs, following a disciplined installation and monitoring protocol ensures that your filtration system operates at peak performance, protecting both your equipment and your end product.
