


Strainer Basket Assembly Installation
In industrial fluid processing, the integrity of a filtration system is only as reliable as its weakest connection. While the quality of the filter media itself is paramount, the precision of the strainer basket assembly installation determines whether that media performs to its engineered specifications or fails due to bypass, mechanical stress, or improper flow dynamics. For engineers and facility managers, understanding the technical nuances of installing these assemblies is critical to maintaining system uptime and protecting downstream equipment like pumps, valves, and heat exchangers.
Industrial Strainers & Baskets are designed to remove large-scale particulate matter from liquid or gas streams. However, even a high-performance stainless steel basket can be rendered ineffective if the housing alignment is off or if the internal seating is compromised during the installation process. This guide provides a technical overview of the best practices for strainer basket assembly installation, focusing on engineering considerations, material handling, and commissioning protocols.
Understanding the Critical Role of Proper Installation
The primary function of a strainer basket is to provide a barrier that captures solids while allowing fluid to pass with minimal pressure drop. The installation process is not merely about placing a component into a housing; it is about ensuring a hydraulic seal that forces 100% of the fluid through the mesh or perforated metal.
If the strainer basket assembly installation is performed incorrectly, several risks emerge:
* Fluid Bypass: If the basket is not seated correctly against the internal flange or machined surface of the housing, contaminated fluid will take the path of least resistance, bypassing the filter media entirely.
* Mechanical Fatigue: Improperly secured baskets can vibrate or shift under high flow velocities, leading to metal fatigue, broken welds, or mesh deformation.
* Excessive Pressure Drop: Misalignment can cause localized turbulence, increasing the initial differential pressure ($ΔP$) and reducing the overall service life of the filter.
Pre-Installation Checklist for Industrial Strainers
Before beginning the physical installation, technical teams must verify that the components on hand match the system requirements. Kaifil recommends a rigorous inspection of both the housing and the internal basket assembly.
1. Verification of Specifications
Confirm that the basket’s micron rating or perforation size matches the engineering drawings. Check the material of construction—typically 304 or 316 stainless steel for industrial applications—to ensure chemical compatibility with the process fluid. Verify that the pressure rating of the strainer housing exceeds the maximum operating pressure of the system, including potential surges.
2. Inspection of Sealing Surfaces
Inspect the internal machined surfaces of the strainer housing where the basket will rest. Any scratches, corrosion, or debris on these surfaces can prevent a proper seal. Similarly, inspect the basket flange and any O-rings or gaskets for defects. For high-precision applications, the flatness of the sealing surface is critical to preventing bypass.
3. Flow Direction Alignment
Industrial strainers are unidirectional. Most housings feature a cast or etched arrow indicating the required flow direction. Installing the assembly in reverse can lead to immediate basket failure, as the structural reinforcement (such as an external cage or internal support tube) is designed to withstand pressure from a specific direction.
Step-by-Step Strainer Basket Assembly Installation
The process of strainer basket assembly installation requires a systematic approach to ensure mechanical stability and leak-proof operation. While specific designs (such as Simplex, Duplex, or Y-strainers) may vary, the following steps represent the standard industrial protocol.
Step 1: Housing Placement and Support
The strainer housing must be installed in the pipeline with adequate structural support. Large strainers, especially when full of fluid, can exert significant weight on the piping. Ensure that the inlet and outlet flanges are perfectly aligned with the pipeline flanges. Forcing a connection can introduce piping stress, which may distort the housing and prevent the basket from seating correctly.
Step 2: Cleaning the Internal Chamber
Before inserting the basket, the interior of the housing must be thoroughly cleaned. Manufacturing debris, weld slag, or leftover packaging materials can damage the fine wire mesh of the basket during the initial startup. Use a lint-free cloth and a compatible cleaning agent to wipe down the internal sealing areas.
Step 3: Basket Insertion and Seating
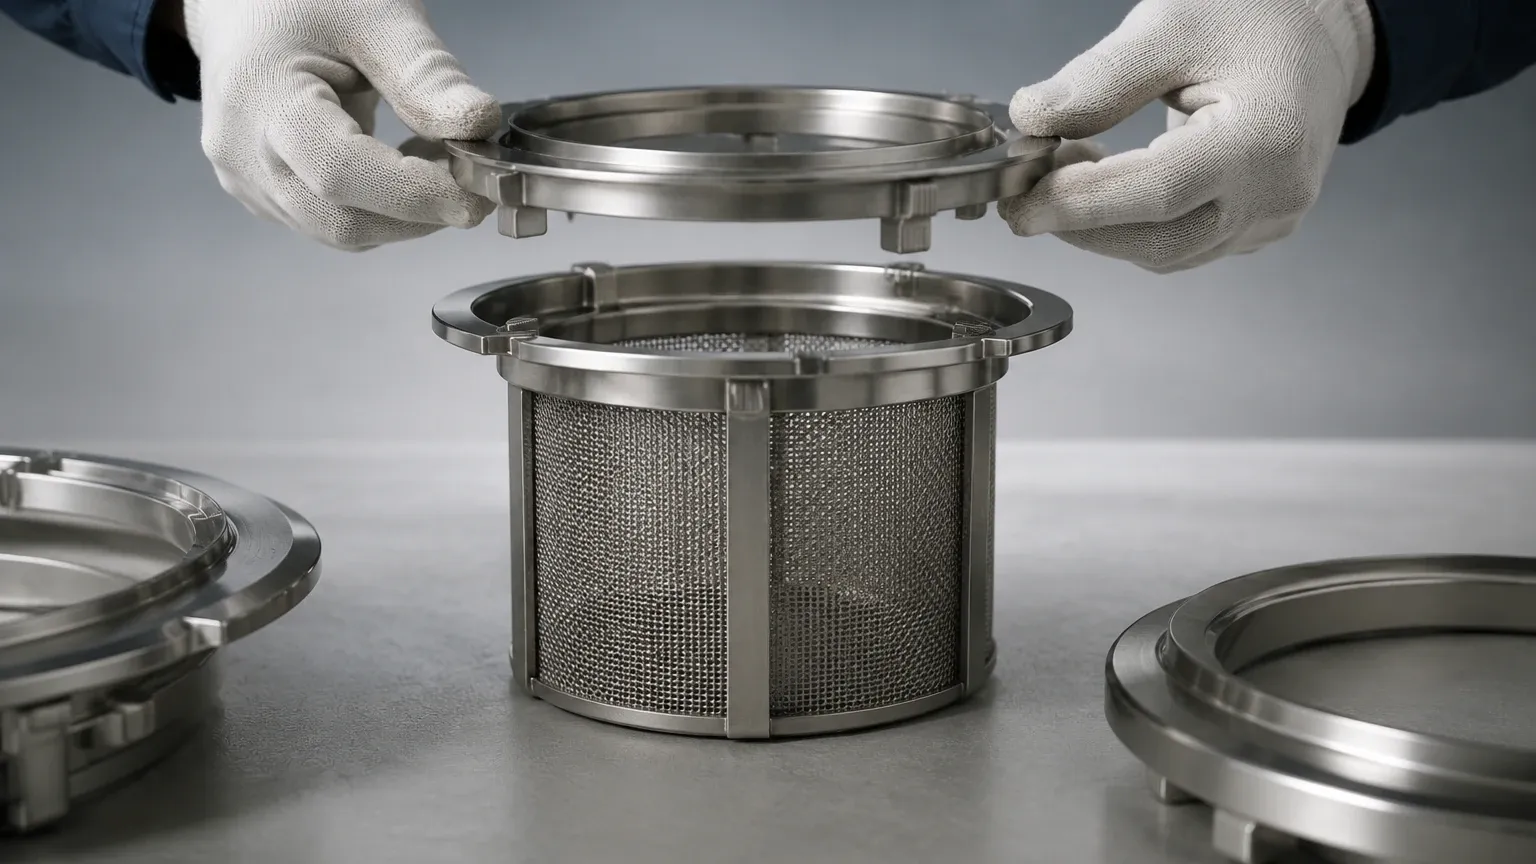
Carefully lower the basket into the housing. In many heavy-duty designs, the basket is equipped with a handle or a lifting lug. Ensure the basket is oriented correctly; some designs use a locating pin or a notched flange to ensure the basket cannot rotate during operation. The basket must drop into its seat firmly. If there is resistance, do not force it, as this may indicate a misalignment or the presence of an obstruction.
Step 4: Gasket and Cover Installation
Place the cover gasket or O-ring onto the housing flange. For B2B applications where high temperatures or aggressive chemicals are present, ensure the gasket material (e.g., PTFE, Viton, or EPDM) is appropriate for the environment. Place the cover on the housing. For bolted covers, use a star-pattern or cross-pattern torque sequence to ensure even pressure across the seal. This prevents localized gasket compression, which is a common cause of leaks.
Technical Engineering Considerations for Optimal Performance
When planning a strainer basket assembly installation, engineers must look beyond the physical assembly and consider the fluid dynamics of the system.
Open Area Ratio (OAR)
The efficiency of a strainer is often measured by its Open Area Ratio—the relationship between the internal cross-sectional area of the inlet pipe and the total open area of the basket mesh. A high-quality installation aims to maximize the OAR to reduce the frequency of cleaning cycles. If the installation environment restricts flow (e.g., being located too close to a 90-degree elbow), the effective OAR may decrease due to uneven flow distribution across the basket surface.
Differential Pressure Monitoring
No installation is complete without the integration of differential pressure ($ΔP$) gauges. These gauges measure the pressure drop across the strainer basket. During the initial commissioning, engineers should record the "clean" pressure drop. This baseline data is essential for determining the replacement or cleaning cycle. Typically, a basket should be cleaned or replaced when the $ΔP$ reaches 10-15 psi over the baseline, though this varies by application.
Structural Reinforcement
In high-viscosity or high-velocity applications, the basket assembly may require additional structural support. This often involves a perforated metal backing for fine wire mesh. During installation, ensure that the reinforcement is positioned on the downstream side of the mesh to provide the necessary mechanical resistance against the fluid force.
Commissioning and Performance Verification
Once the strainer basket assembly installation is physically complete, the system must be commissioned with care. Sudden pressure surges during the initial fill can damage the basket or dislodge seals.
1. Slow Fill: Gradually open the upstream valve to fill the strainer housing. If the housing is equipped with a vent valve, keep it open until a steady stream of liquid appears, ensuring all air is purged from the chamber.
2. Leak Testing: Once the system is pressurized, inspect all joints, including the cover seal and flange connections, for leaks. Even a minor drip can lead to significant material loss or environmental hazards over time.
3. Flow Stabilization: Monitor the system as it reaches full operating velocity. Listen for unusual noises, such as whistling or rattling, which could indicate that the basket is not seated properly or that cavitation is occurring.
Troubleshooting Common Installation Issues
If the system fails to meet performance expectations following a strainer basket assembly installation, technical teams should investigate the following common issues:
* High Initial Pressure Drop: This is often caused by air trapped in the housing or an incorrectly sized basket for the fluid viscosity. Re-vent the system and verify the mesh size.
* Downstream Contamination: If solids are found downstream, it indicates a bypass. Inspect the basket seat and the gasket for gaps. Ensure the basket was not installed upside down or without its required hold-down spring (if applicable).
* Vibration and Noise: This usually points to improper housing support or flow velocities exceeding the design limits of the strainer. Ensure the housing is anchored and that the flow rate is within the manufacturer’s specified range.
Integrating Custom Filtration Solutions
For complex industrial environments, standard off-the-shelf components may not suffice. Custom-engineered Strainers & Baskets allow for specialized configurations, such as wedge wire construction for high-strength requirements or multi-layered sintered mesh for precise fine filtration.
When working with custom assemblies, the installation process remains the same in principle but requires even closer attention to the manufacturer’s tolerances. As a professional manufacturer, Kaifil provides detailed technical data for each custom component to ensure that the strainer basket assembly installation aligns perfectly with the unique demands of the application, whether in chemical processing, water treatment, or the food and beverage industry.
By following these technical guidelines, engineering teams can ensure that their filtration systems operate at peak efficiency, protecting expensive downstream assets and maintaining the purity of the process fluid. Proper installation is not just the final step of procurement; it is the foundation of long-term operational reliability.
